01.06.2019
Sweet girl cake recipe. Preparation of cream for the cake "Milk Girl"
This was in 1913. An eleven-year-old girl, a boarder at the Moscow Rzhev Gymnasium, pestered her uncle with a request to show what he had written on the medallion, which he always carried with him on his chest. The uncle took off the locket and handed it to the girl. The girl opened the lid, and there was nothing written. In addition to 5 musical lines and four notes: sol-sharp - si - f-sharp - mi. The girl hesitated for a moment, and then shouted cheerfully: “Uncle. I know what is written here. The notes on the medallion mean, “I love you.” And here comes the question. Can you imagine how this girl was taught, if she, seeing four notes, sang them to herself, and after singing, she recognized the beginning of Lensky's arioso from Tchaikovsky's opera "Eugene Onegin". It turned out that this medallion is such an original declaration of love, once received by the girl's uncle as a gift from his bride before their wedding. But you think, because the girl is only 11 years old! How did they manage to teach her that? And not in a special music school and not in a music college, but in a normal Russian gymnasium, and even in the elementary grades. Q: How was this girl taught? - I have already asked, now I will ask one more question, the answer to which goes beyond reasoning about the level of education only, but concerns the questions of the gene pool. How should a boy be taught so that he will ever approach such a girl and talk to her, interest her as a worthy interlocutor, as a person, and eventually win her heart? Having trained the girl at such a level, she was, as it were, vaccinated against lack of spirituality, from that flow of primitive monotony, which I conditionally call “disco”. To this girl, if only any boy would not suit. But even if it fits, it is unlikely to find mutual understanding ... Thus, we are talking about the level of contact, the level of spiritual, cultural conformity. Consequently, teaching the girl art, music, poetry, already in the lower grades of the Russian gymnasium, educating (or, better, shaping) a spiritual need, they thought about the gene pool, about the intellectual society of the future. But did a boy exist in Russian society - a worthy partner of our little schoolgirl? Of course yes! You didn't think. why did all the officers of the tsarist army learn to play the piano? Is it really necessary for combat training? For combat, perhaps not, but for the gene pool - of course, yes !!! Think about it, what kind of image is this - an officer playing the piano? Yes, this is a symbol of male harmony - a combination of officers and music. On the one hand, an officer is a defender, a warrior, and on the other hand, a subtle interpreter of the music of Tchaikovsky and Chopin... culture and prepared a cultural explosion, similar to which, I think, the history of mankind has not yet known ... M. Kazinik “Secrets of Geniuses”
Hi all. Today I will tell you about a cake with an unusual name - Dairy Girl. The recipe originated in Germany, it is baked on the basis of Milch Mädchen condensed milk, which in Russian means Milk Girl. The cakes are incredibly tender and just melt in your mouth.
As always, the preparation is simple. Few ingredients, fast kneading dough, which can be done without the use of a mixer. The only thing you have to tinker with a bit is baking. Since the cakes must be made thin, and bake on a baking sheet, and not in molds. But first things first.
How to make a Milk Girl cake at home, step by step recipe with photos
Ingredients:
- 1 can of condensed milk
- 2 eggs
- 160 gr. flour
- 1 st. l. baking powder
Cooking:
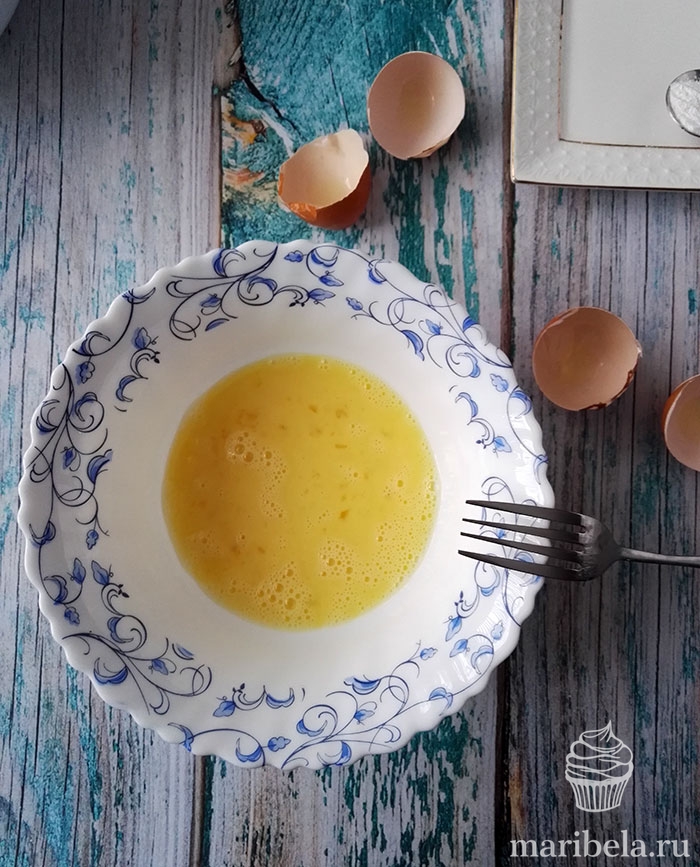
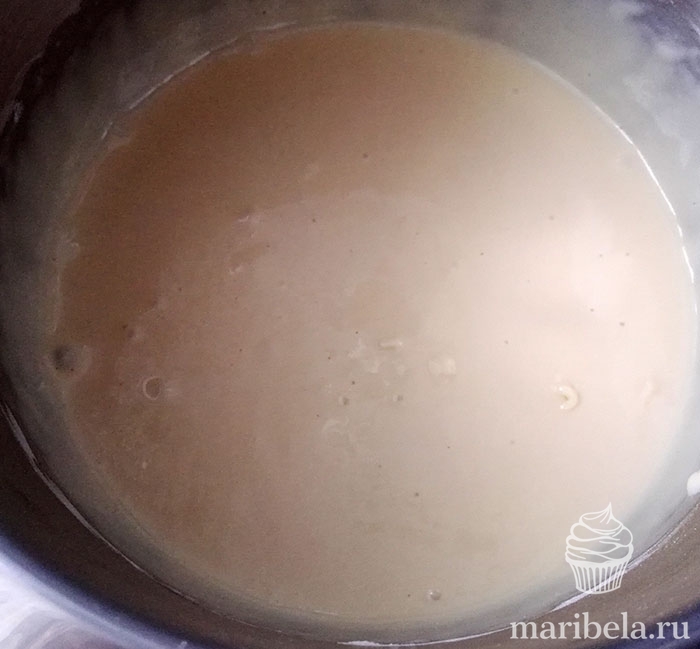
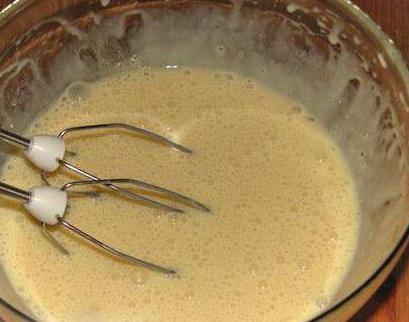
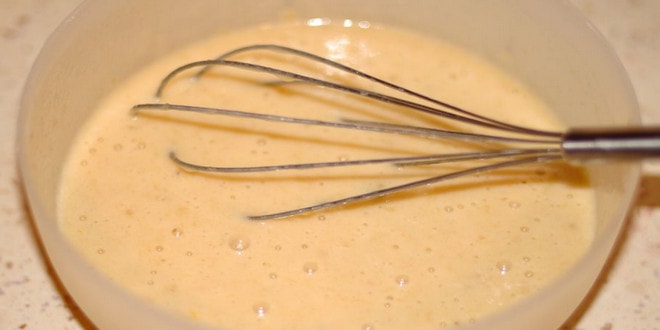
In a bowl, lightly beat 2 eggs with a fork.
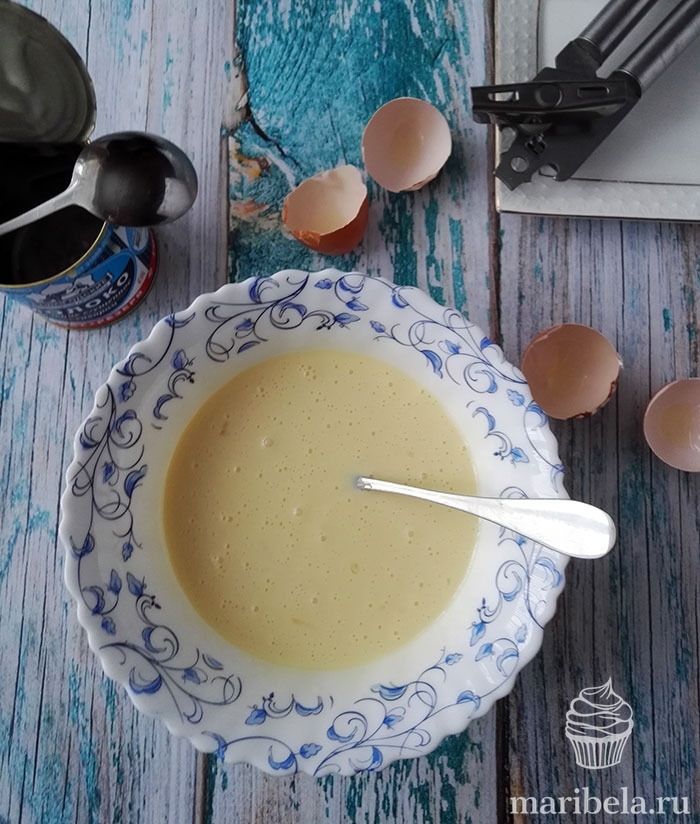
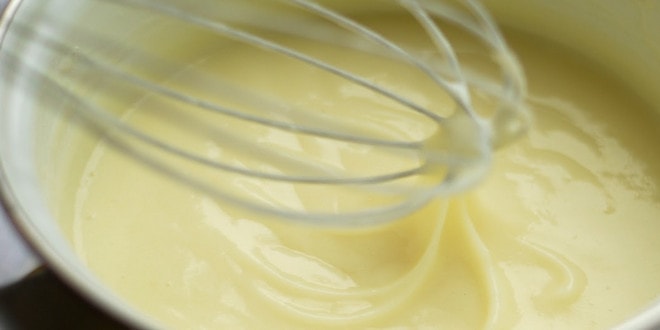
Add a jar of condensed milk there, mix everything until smooth.
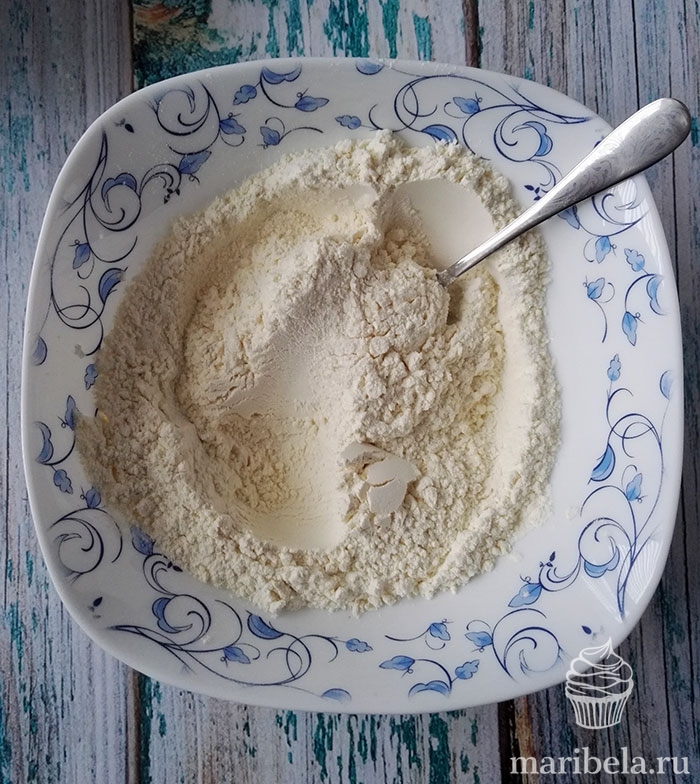
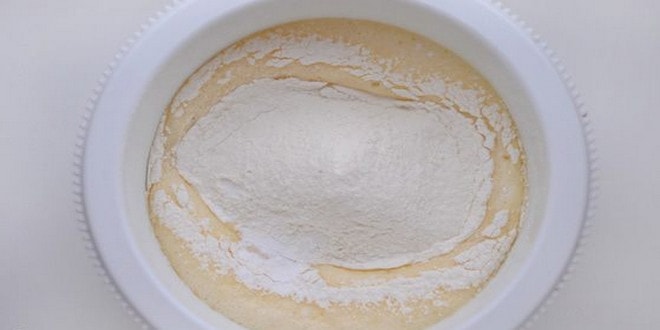
In another bowl, combine sifted flour with baking powder.
Everything, our dough is ready!
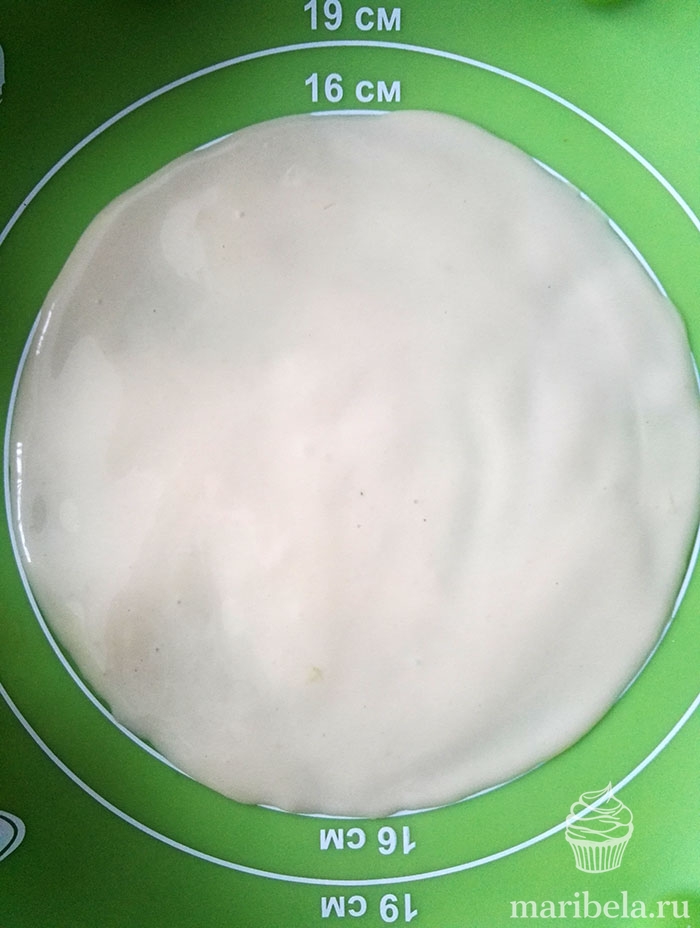
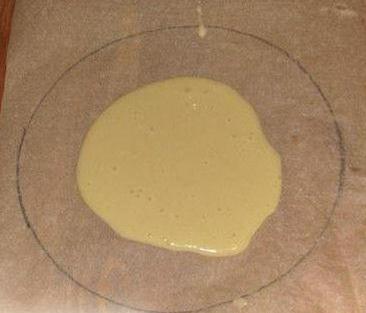
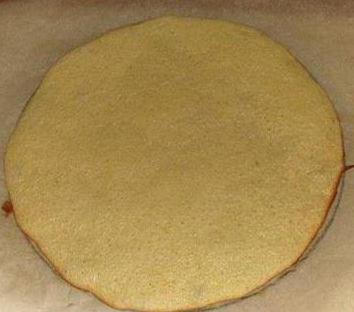
Now the only difficulty. The cakes should be thin, for this we take baking paper and draw a circle. What diameter do you want. I love high cakes, so I had 16 cm. 7 cakes came out of this amount of dough. If you take a diameter of 18, then I think it will come out with 5 cakes, it’s better not to do less. If you want a bigger cake, then by 20 - 22 diameter you need to double the amount of dough.
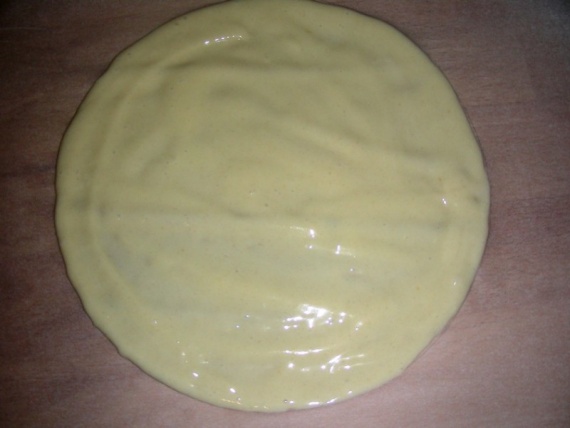
So, we drew circles (if the diameter is small, then 2 shortcakes will fit immediately on a baking sheet), turn the paper over to the other side, and spread the dough with a spoon, trying not to go beyond the outlined line. No need to grease the parchment!
There is another way, this is for those who have a baking ring at home. We put it (ring) on a baking sheet, previously covered with paper, and distribute the dough inside this ring, then remove it. Get smooth circles.
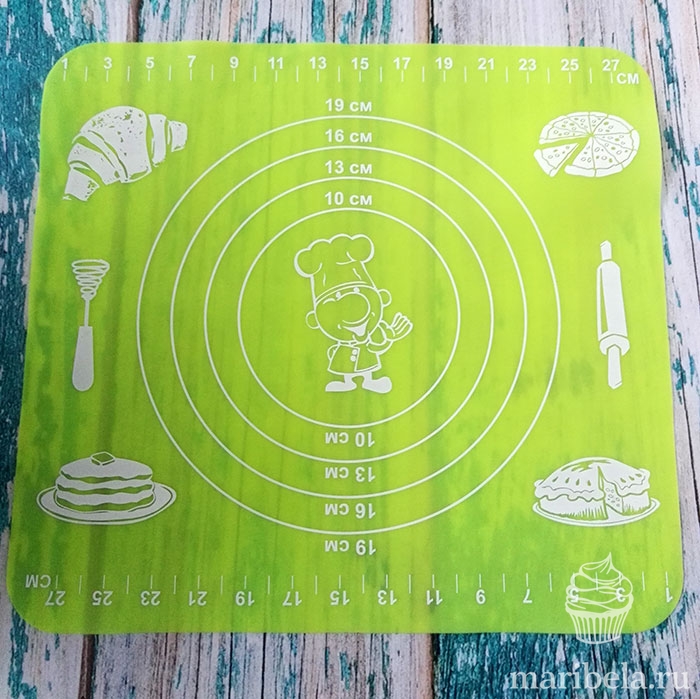
Well, I used the laziest method 🙂 Since I am the proud owner of a silicone mat with already printed markings. It's just a wonderful thing. If you see it in the store - take it, you will not regret it. My rug cost about 400 rubles.
At 16 diameter, it took me about 1.5 tablespoons of dough. At 20, I think it will be 2. Try to distribute the dough evenly, especially the edges, do not make them thin, otherwise they will quickly burn.
In order not to pull out the baking sheet every time, I put my silicone mat in a larger baking dish.
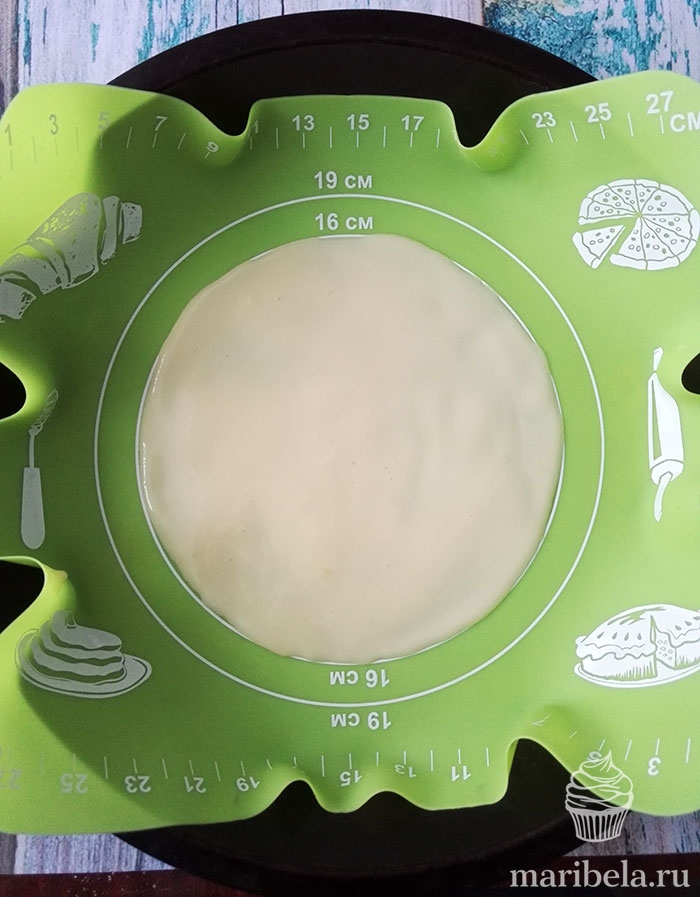
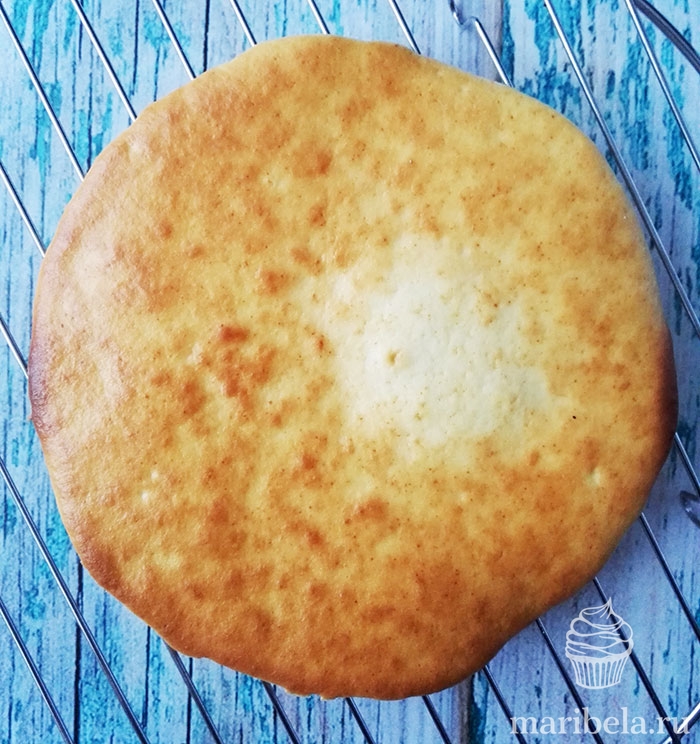
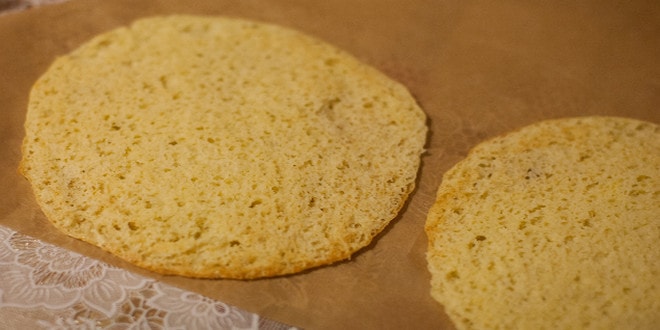
We send the prepared baking sheet with our dough to a preheated oven. Temperature 180° for 7-10 minutes. The time depends on your oven, as soon as it browns - take it out. Somewhere around 3 shortcakes, you'll get used to it. My first portion was baked for 8 minutes, the rest for 6.
This is what the crust will look like.
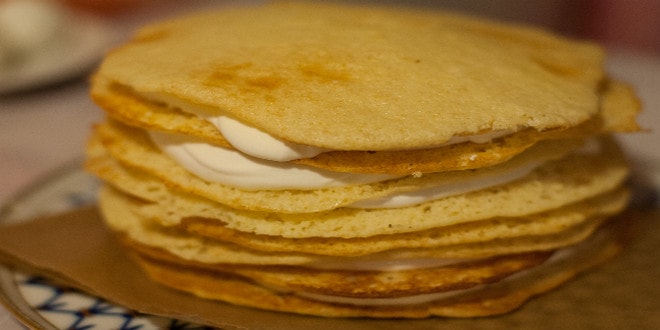
As soon as the cakes have cooled, it is better to immediately start assembling the cake.
In the original, whipped cream is the layer between the cakes, I didn’t experiment with the cream for the first time and did the same. For my cake one serving of cream from 500 ml. there was a lot of cream, I think 350 - 400 ml. enough for the eyes, but on top of my cake was covered with another cream. If you decide to leave only the whipped cream, then 500 ml. should just be enough. If, suddenly, you don’t know how to prepare this cream, then here is a link where I tell everything in detail -.
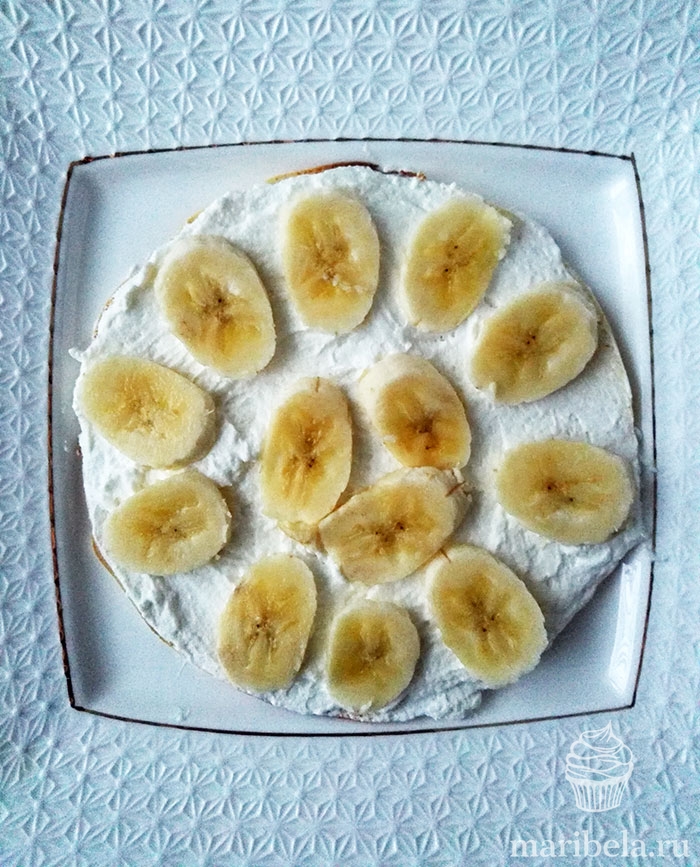
As a filling, I chose a banana, firstly, with such delicate cakes and light cream, I am most impressed with this option. Well, secondly, it's winter now and there are few fresh berries and fruits. You can add your own, but it must be something that is not watery so that it does not run. Another important point, try not to make the filling too thick, if you want, for example, to put canned peaches, then it is better to cut them in a thin layer, the same goes for pineapples - it is better to cut the finished circles additionally. Otherwise, the cake will come out uneven.
So, in detail about how to assemble the cake.
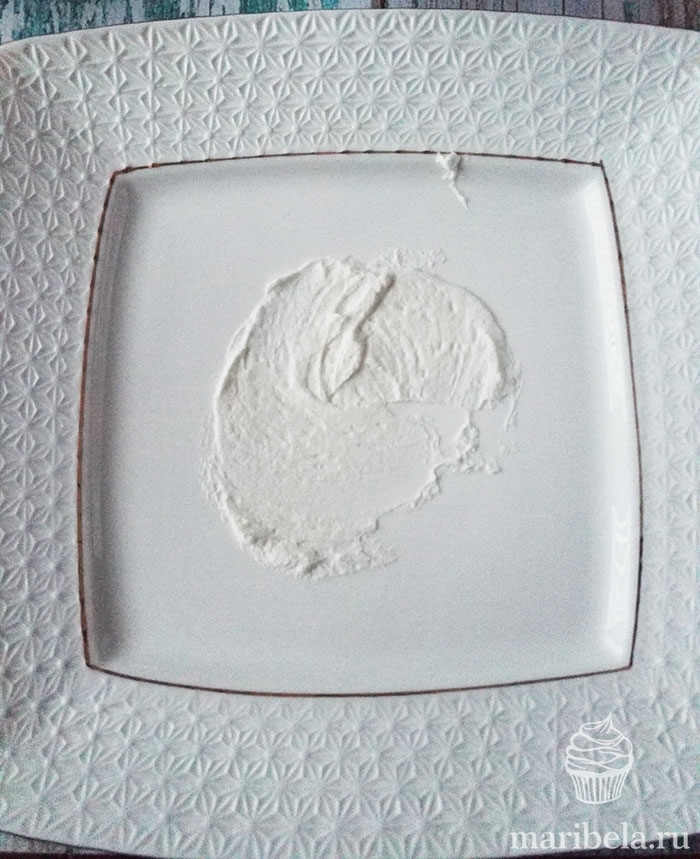
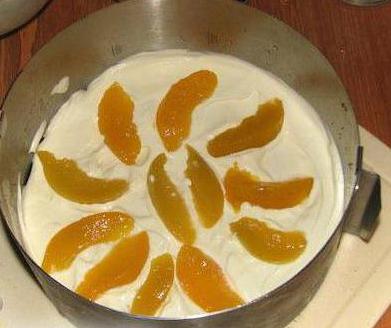
It is best to collect in a ring, so for sure the cake will turn out even in the end. Unfortunately, I don’t have it yet, I made it right on the dish.
We grease the plate a little with cream so that the bottom cake sticks, and it is more convenient for you to work further.
We put the cake, grease with cream, spread the filling.
And so on until the end. I didn’t cover the last cake with cream, as I planned to level the cake before serving, cream, of course, is not suitable here. On top of the cakes, you need to put a load, and put it in the refrigerator for a couple of hours so that the cakes are soaked and the cake settles a little, while taking more or less correct form. After the refrigerator, you can start decorating.
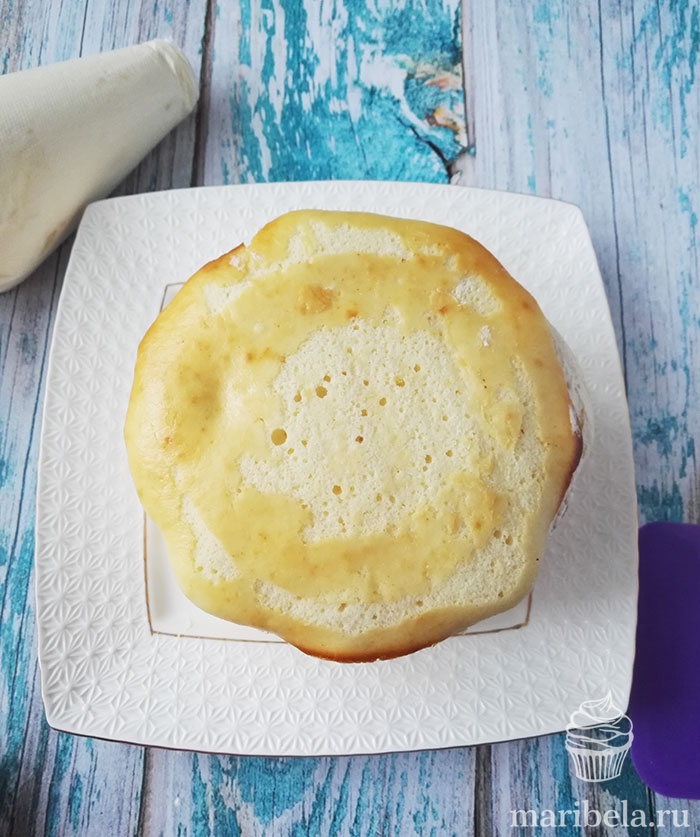
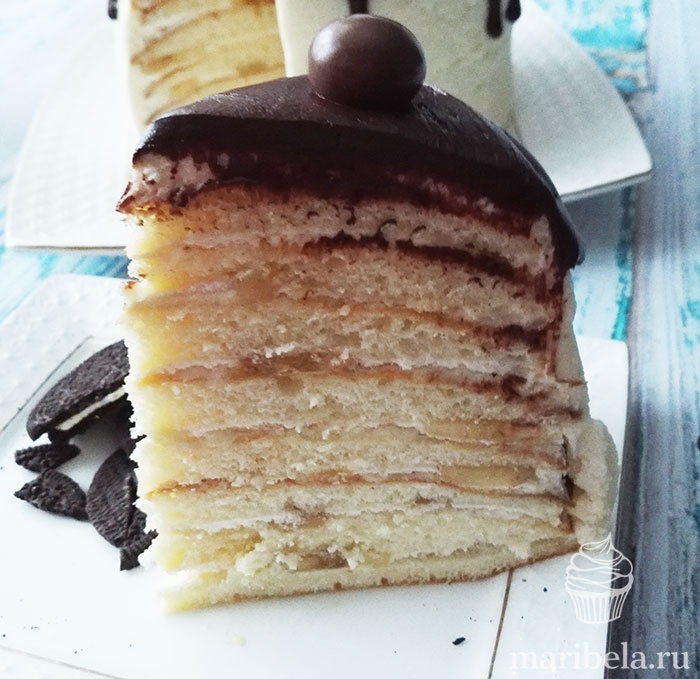
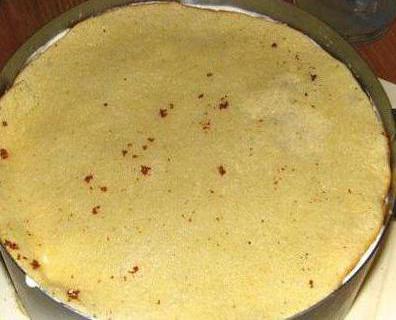
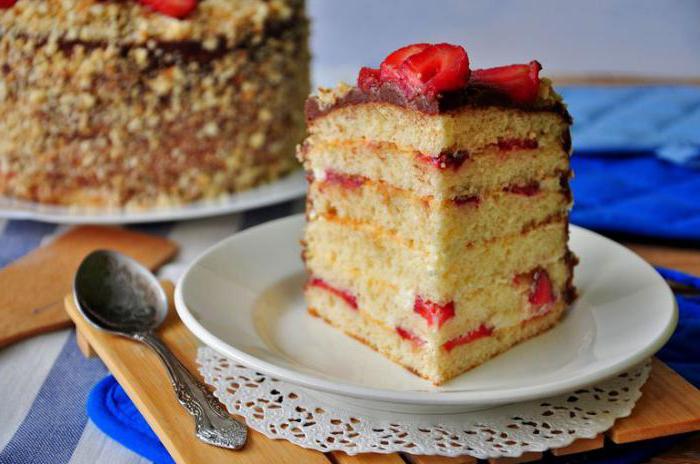
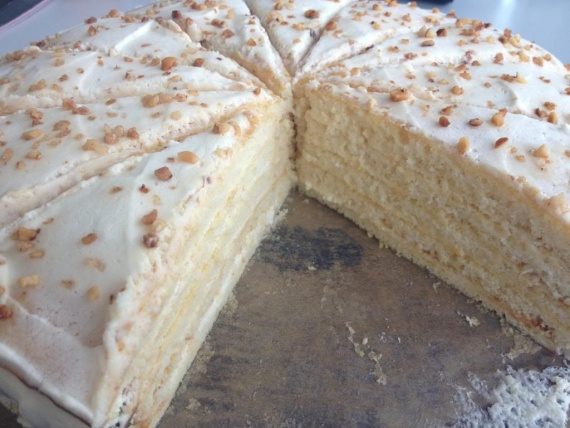
Here in this photo you can clearly see how porous, airy cakes are inside. I smoothed the top of the cake.
But if you don’t want to fool around for a long time, then you can sprinkle biscuits or nuts ground into crumbs on top of the cream cream, it will also be beautiful and tasty.
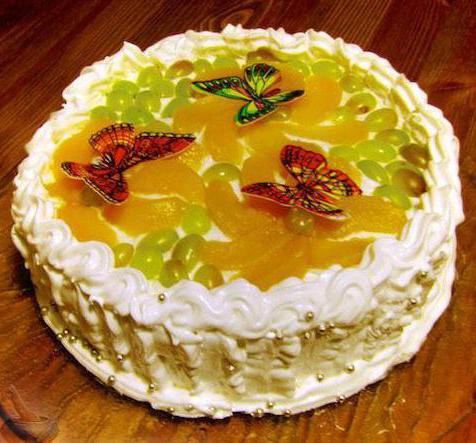
After leveling the cake, I covered the top with dark chocolate ganache, made smudges and decorated with sweets. Here's what I ended up with.
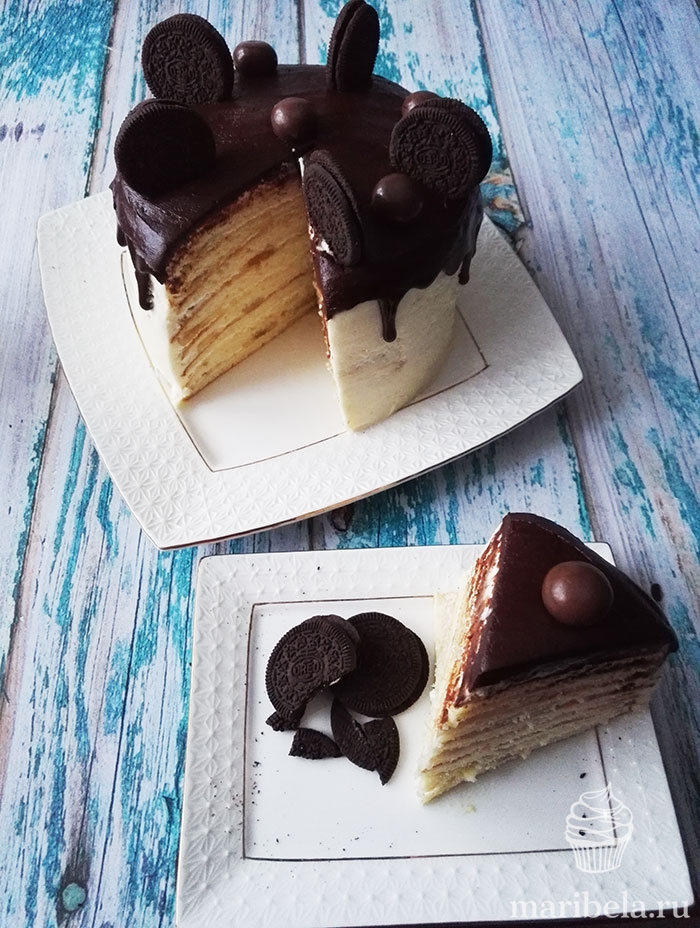
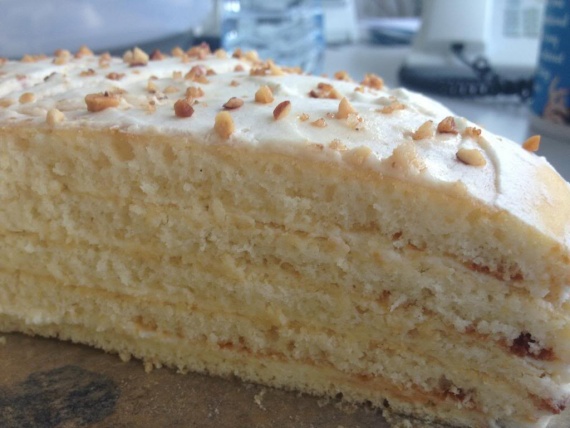
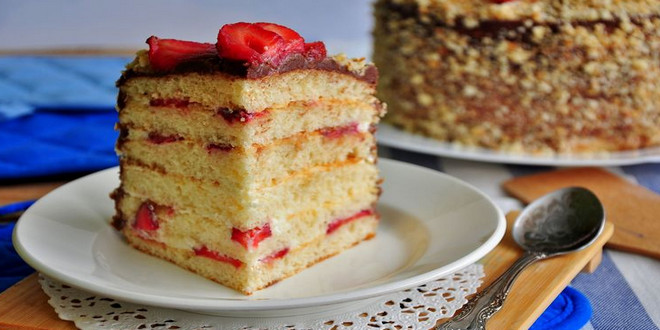
Here is a closer cut, you can see how the cakes were soaked, I made a thick layer of cream. During the night, the cream soaked into the cakes, making the cake unusually tender.
Perhaps I'll give you a couple more tips. As always, if there are few ingredients in the dough, then their quality must be taken very seriously. And now I'm talking about condensed milk. I was lucky, I live in the city of Vologda, where excellent dairy products are produced. I have already praised our condensed milk more than once. And I will say it again - take either him or the Rogachev company. These are proven products, where condensed milk is thick, not liquid, then the dough will turn out to be the right consistency.
Another very important point - baking paper must be good. In my article - "", I already wrote that I use only Frau Martha. And if you don’t want to tear off the stuck cake from the parchment for hours, then use a trusted company. I had no problems with the silicone mat, the finished cake easily moved away from it. If the biscuit does not come off, then you either do not bake the cake, or you come across low-quality paper - a rug.
In my opinion, this is the perfect cake for children, especially for very young ones. You can replace cream from cream with or (click on the links and you will be taken to the recipe pages). Well, the banana filling is just right for them. By the way, I didn’t process bananas with anything, they didn’t darken in the filling, but it probably depends on the variety. It is better to pre-cut the banana, leave it on a saucer and look at the color, if it starts to turn black, then it is better to sprinkle with lemon juice.
P.S. Since I have already prepared this cake more than once, I want to supplement my post. Instead of cream as a cream, it is very tasty and (links are active, you will find them detailed description cooking process), and if you like cream cheese, then you can safely add it inside (I have 2 versions of this cream on my blog, and choose the one you like best). But the filling is delicious with strawberries, cherries, kiwi-banana and.
I am sure you will love this cake. Bon appetit.
Extraordinarily a delicious cake"Milk girl" is familiar to sweet tooth as airy, tender delicacy whose homeland is Germany. This wonderful confection is also called "Love Cake". The treat is distinguished by a creamy taste and extraordinary tenderness of the cakes. According to experts, the Milk Girl cake with sour cream just melts in your mouth. The recipe for its preparation is simple, baking a delicacy at home is not difficult.
origin of name
The name of the cake - "Milk Girl" - is given in honor of the well-known brand in Germany. It was there that the recipe for this confectionery was born. The dough for cakes is made on condensed milk.
Milk Girl cake recipe with sour cream
The classic interpretation of the delicacy is a variant of a cake with ice cream, but many well-known confectioners use their own recipes for making creams: with creme brulee, with condensed milk and sour cream. Cake "Milk Girl" with sour cream (photo presented in the article) is especially popular with sweet lovers. There are many options for treats. Many housewives, among other things, like dessert because it is easy to diversify it by using various creams or berries and fruits, both fresh and canned. The article offers a basic recipe. Each hostess can bring something of her own to it.
Ingredients
Cake "Milk Girl" with sour cream (12 servings) is prepared from the following products.
For the preparation of cakes you need to use:
- 1 can of condensed milk;
- flour - 1 cup;
- eggs - 2 pcs.;
- slaked soda - 1 tsp (some use baking powder - 1.5 tsp).
For the cream you will need:
- 350 g sour cream (20%);
- 3 art. l. powdered sugar;
- small jar of canned peaches.
You can decorate the cake with protein custard, sugar sprinkles, fruits, waffle butterflies.
"Milk Girl": cake recipe step by step
At home, preparing a dish, as the authors of the reviews assure, is quite simple. "Milk Girl" is a wonderful treat on condensed milk, for the manufacture of which, in principle, neither a mixer is needed (but if such a device is available, it's great), nor a baking dish.
So, how to bake a Milk Girl cake? A recipe with a photo (a step-by-step guide is given below) is a great help for novice confectioners. Experienced hostesses advise: for cooking, you must use products at room temperature. The process itself, of course, takes place in several stages.
Cooking the dough
The first step is to thoroughly mix the eggs with condensed milk. Add sifted flour, soda or baking powder to them. In this case, you can use a spoon or fork to stir.
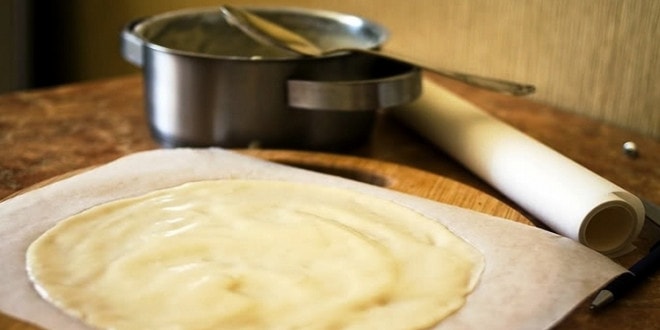
Many housewives use a mixer, believing that it is more convenient. Having thoroughly mixed the components, we get a soft, moderately liquid dough. Next, take baking paper and a plate. Circle the plate in a circle, turn the paper over with a pencil down. The recommended circle diameter is about 19 cm.
After that, two tablespoons should be poured into the center of the mug. ready dough. It should not spread too much in a circle. The dough should be evenly distributed over the paper. Those who think that it turns out too thin do not need to worry - the thinner the cakes, the tastier the cake.
We bake cakes
To bake a cake, you should set the temperature in the oven to about 180-200 degrees. It is necessary to bake cakes until golden color and creamy aroma appear. Products are removed from the baking paper while still hot, otherwise it will be impossible to tear them off the paper.
Preparing cream for impregnation
Many people like the Milk Girl cake with sour cream. This cream gives the product a slight sourness, the taste is very harmonious. Hostesses recommend using 20% sour cream. The cream turns out lush and will keep its shape better. But they also use 15% product. We prepare the cream by simply mixing the products proposed in the recipe (see above).
Assembling the cake
To assemble the cake, prepare 5 cake layers, cream, peaches (canned) and juice from them, necessary for impregnation. Many home confectioners recommend assembling the cake using a pastry ring or a ring from a split mold. But you can, of course, do without it. The lower cake should be put in a ring, soaked with peach syrup, smeared with cream and put the fruit. Do the same with subsequent cakes. The top also needs to be smeared with sour cream.
We impregnate
Next, the cake is sent to the refrigerator for 3-4 hours, you can for the whole night. During this time, thin cakes are well soaked and become juicy and lush. They have a sweet taste, but the use of sour cream helps to ensure that this sweetness is not cloying. The delicacy is very popular with both children and adults.
Decorate the cake
You can decorate the cake with protein custard, fresh grapes or peaches. From above, you can plant waffle butterflies to give brightness to the product. It makes a nice treat for tea.
Options
housewives offer different variants cake: with cream, with bananas, with chocolate and caramel cream, with fragrant strawberries. In any case, the delicacy is quite easy to prepare. A multi-layered biscuit cake soaked in sour cream and supplemented with some interesting nuance suggested to the hostess by her imagination turns out to be unusually juicy and tender.
Sour cream cake with strawberries
The ingredients used are the same as in the basic recipe. Only strawberries (150 g) and chocolate icing are added to them. Cakes are prepared and baked according to the scheme described above. During the assembly of the product, sour cream is applied to the cooled cakes and cut strawberry slices are placed. So all cakes are smeared. The cake is smeared with cream and put in the refrigerator for a couple of hours. While the treat is soaking, you can prepare the icing, which many consider the easiest and most successful way to decorate the treat.
How to prepare glaze?
Hostesses offer various options glaze preparation. The easiest way is to melt a chocolate bar (white or black), add a little cream or milk. But you can make icing from cocoa. To do this, mix 3 tbsp. l. (with a slide) cocoa powder, sugar (to taste), sour cream or milk (4 tablespoons). Stirring, cook on fire until the sugar is completely dissolved. Next, add a little butter (about 50 g). Put back on fire and cook until bubbles appear, but do not boil. When the icing becomes thicker, it needs to be slightly cooled, and you can pour it on the cake.
What's next?
Next, a slightly cooled cake is poured with icing, sprinkled with chopped cake scraps (you can use a blender) and decorated with strawberries. The cake is again put in the refrigerator to soak (at least 3-4 hours, preferably all night). Experienced housewives recommend not to regret creams. Cakes will absorb it almost completely. As a result, the cake will turn out very fragrant and juicy.
We decorate the cake with mastic
Some housewives advise decorating the Milk Girl cake with sour cream with mastic. Makes a great meal for children's holiday. From the cooled mastic, you can fashion any fairy-tale or cartoon characters that will amuse the kids.
How to prepare mastic?
Put marshmallows in a deep bowl, put in the microwave for 1 minute. Melted sweets turn into a viscous homogeneous mass. Powdered sugar is added to it (in small portions) and kneaded with a spoon. After the mastic begins to lag behind the walls of the container, it should be transferred to a surface sprinkled with starch and continue to knead, adding starch and powder. The mass will turn out soft and plastic. It is wrapped in a plastic bag and sent to the refrigerator.
How to decorate a cake with mastic?
After the cake is already ready, the mastic should be removed from the refrigerator, let it lie down so that it warms up and becomes plastic. Next, the table is sprinkled with powder and the mastic is rolled out with a rolling pin. The thickness of the layer should be about 5 mm. Mastic is carefully wound on a rolling pin and covered with a cake, removing and smoothing all the folds and bumps. After that, the dessert is put in the refrigerator. From the leftovers, if desired, you can fashion figures of your favorite children's characters and seat them on the surface of the cake. Happy tea!
Cake "Milk girl" It owes its name to a well-known German condensed milk manufacturer, which gave its products the name "Milch Mädchen", that is, a milk girl. And the local housewives did not puzzle over how to call the sweet cake, the cakes for which basically contain this very condensed milk. In turn, the idea of preparing such delicious pastries was picked up by our compatriots, simply translating the name. And today we will prepare cake "Milk girl" to appreciate its taste and find out why it took root so well in the kitchen of the hostesses of two countries at once.
Milk Girl Cake Ingredients:
For cakes
- Condensed milk 400 grams
- Eggs 2 pieces
- Wheat flour 160 grams
- Baking powder for the dough 1 tablespoon
For cream
- Cream (over 30% fat) 400 milliliters
- Powdered sugar 1/2 cup
Products not suitable? Choose a similar recipe from others!
Inventory:
Baking parchment, mixer, sieve, tablespoon, baking sheet, oven mitts, serving dish, spatula or butter knife, two deep plates, can opener.
Cooking cake "Milk girl":
Step 1: knead the dough.
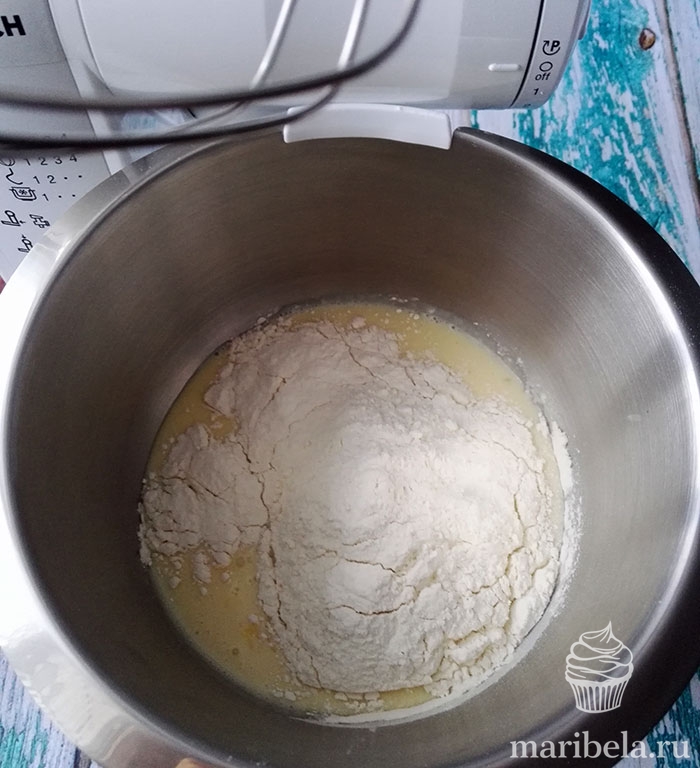
It is very easy to knead the dough for cakes. First, break a couple into a deep plate chicken eggs and pour in the condensed milk. Mix everything well with a mixer to get a homogeneous mass.Sift the flour and baking powder into the same bowl. Again, grab the mixer (however, you can handle it with a regular whisk) and mix everything well. You should get a viscous mixture, the consistency is more liquid than thick.
Important: there is one little secret if you let the test stand 15 minutes, the cakes will turn out a little more magnificent.
Step 2: bake the cakes.
While the dough is resting a little, prepare the baking parchment. Take one sheet that fits your baking sheet in size and shape, and draw a circle on it with a diameter of 18-20 centimeters. If there are two circles on the parchment, then draw two, only so that they do not touch each other. Spread the paper with the circles drawn on it over the baking sheet.
Spoon the batter onto the baking parchment and smooth out so that it covers the entire circle in a thin layer. Usually you need no more 2 tablespoons, take this into account.
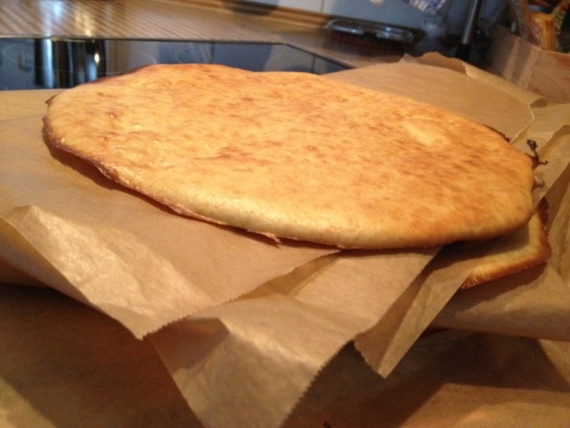
Place the cakes in preheated 180 degrees oven on 5-7 minutes. The dough should be browned, it is also laid out in a very thin layer, so it will bake instantly.
As soon as the cakes are ready, immediately remove them from the oven, remove from the parchment and remove to cool on a kitchen towel or on a clean sheet of paper. And at this time, prepare a new batch of cakes yourself by pouring the dough on the parchment again and putting it in the oven until cooked.
When all the cakes are ready, they can be stacked on top of each other, laying baking parchment between them, and start preparing the cream while the dough cools.
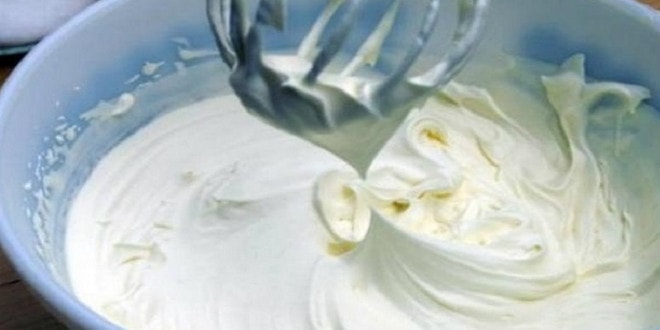
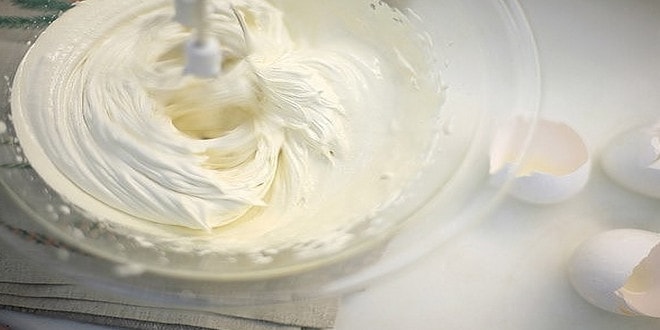
Step 3: prepare the cream.
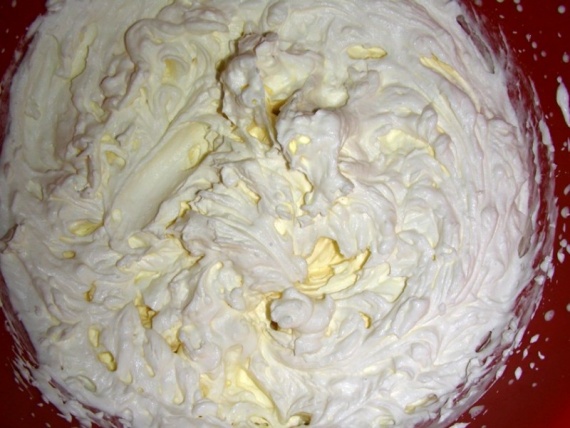
Cream must be whipped with a mixer with powdered sugar into foam. In order for everything to work out as it should, the cream and all the devices for making the cream must be chilled. And, of course, fat content is very important, if it is less than 30-35%, then the cream is unlikely to whip into cream.
Step 4: assemble the cake.
Cakes and cream are ready, only the simplest thing remains: to assemble the cake. To do this, simply stack the cakes on top of each other, generously spreading each layer with whipped cream. Do not spare the cream, as the dough absorbs the layer very well, becoming tender and even tastier.
At the end, spread the remaining cream on the cake on all sides and on top, if you wish, you can decorate your dessert with something else, for example, coke chips or almond petals, I just have crushed nuts.
To make the "Milk Girl" cake even tastier, you need to let it brew, it is best to send it to the refrigerator overnight, and enjoy a wonderful dessert only the next day.
Step 5: serve the cake.
Cake "Milk Girl" is suitable for an ordinary family tea party, and for a festive table. It is easy to prepare and leaves a wide scope for imagination, so that each housewife can decorate it in her own way. A cake can become a work of art, or, in my case, find a homely simple appearance. And it will still be very tasty and beautiful!
So, what's so special about the Milk Girl cake? You've probably figured it all out by now. It is easy to prepare, all the ingredients can be found if not in the kitchen, then in the nearest store, and the taste of this dessert is simply delicious, sweet and incredibly tender! It is not surprising that for many housewives the recipe for this cake is marked as their favorite.
Bon appetit!
If you doubt the quality of baking paper, grease it with vegetable or butter, then the cake will definitely not stick.
You can decorate the "Milk Girl" cake with chocolate icing, any berries or nuts, all this goes well with sweet cakes and a delicate cream of whipped cream.
Instead of cream, if suddenly your nearest store doesn’t sell fatty enough, you can use sour cream, it is whipped with powdered sugar in the same way.
When the traditional "Honey cake" and "Napoleon" no longer cause enthusiastic looks and pleasant compliments from relatives, there is a desire to cook something new.
I spent several days searching interesting recipe for a cake that would not be like the rest. It was difficult to choose, but then I saw a wonderful and very easy-to-prepare cake called "Milk Girl".
- Cooking time: 3 - 3.5 hours.
- Servings: 14 (for a cake with a diameter of 20 cm)
- Kitchen appliances and utensils: small and deep bowl, mixer, oven, baking sheet, parchment paper, tablespoon.
Required products
- Wheat flour-200 g;
- baking powder-15 g;
- condensed milk-500g;
- eggs-3 pcs;
- a pinch of salt;
- butter-80 g
The history of the appearance of the "Milk Girl"
Probably, in addition to the question of how to make a Milk Girl cake, most people have even more curiosity about why it is called that. Everything is very simple. This dessert comes from Germany.
The basis of the test is condensed
milk, the Germans used a brand of milk called "Milch Mädchen" for this. and we are already using its translation into Russian.
This cake was not invented by great cooks and confectioners. The idea came from ordinary German housewives who decided to diversify a dessert dish for their family using improvised ingredients.
How to make a Milk Girl cake at home
The process itself is very easy, but takes a lot of time. In order to avoid mistakes, I suggest you make a Milk Girl cake according to my recipe described below with a photo and collect such beauty step by step.
I divided the whole process into three stages: preparing the dough, baking it and preparing the cream.
First stage: preparing the dough
To do this, prepare the dry ingredients. Be sure to sift the flour through a sieve so that it is saturated with oxygen, and add the baking powder to it. Mix the mixture well.
In a separate bowl, we are engaged in the “wet” half of the dough. Pour the condensed milk into a deep bowl, beat in the eggs and add salt. Mix everything thoroughly with a mixer.
Now we can introduce dry ingredients into "wet", in no case vice versa. We do this quickly, pouring all the flour with baking powder into a bowl at once, and continue to beat the whole mixture with a mixer at low speed. It is enough to beat for 30 seconds so that everything mixes well. The baking powder can be replaced by mixing baking soda and vanillin. In this case, it is not necessary to extinguish soda with vinegar, since there are no fermented milk products in the dough.
Let's prepare the butter. It needs to be melted down first. You can do this on gas or in the oven. After that, be sure to let it cool down. Now that the oil has reached room temperature, add it to the mixture. Last time beat everything with a mixer and get a wonderful dough: without lumps, homogeneous and slightly liquid.

Second phase: we bake cakes
Now that everything is ready, it's time to start baking the cakes. To do this, you will need parchment paper or other baking paper.
2 tbsp. l. raw dough is one ready-made cake. The mixture must be applied to paper. you can use different forms for the sweet girl cake. They can be square, rectangular, or round, like mine. Some make a cake in the shape of a heart or other figurines.
You need to use only high-quality paper with a silicone coating. Then your cakes will not stick and will easily move away from the paper as soon as they cool a little.
To form the cake, take paper and draw a circle on it with an ordinary pencil. (The radius of the bottom of my removable form is 10 cm.) Now turn the sheet over and place it on the baking sheet with the pattern down.
We collect the dough and evenly distribute it with a spoon, without going beyond the drawn contours. Perhaps you have a silicone mat. Usually they already have an outline that you just need to fill in. Another convenient way is to trace the inner circle from the sides of the removable baking dish.
Note that we do not grease the paper or rug with oil and do not sprinkle with flour.
Now we send the cake to the oven. It must be preheated to 180 °. The crust will take a few minutes to cook.
It is difficult to say the exact time, because everyone has different ovens with their own characteristics. I advise you to focus on the color of the dough.
When you notice that the cake has become golden, it should be removed. Give it a couple of minutes to cool and you can tear off the paper. She should go well and quickly.

Third stage: collecting cake.
To assemble the Milk Girl cake from the presented step-by-step dough recipe, you should get 14 cakes. Now they can be laid out on top of each other. between them we put layers of cream.
Cake layers "Milk Girl" are so versatile that they go well with any curd, creamy, custard or protein cream. I found for myself the perfect combination of cakes and cream, which I will introduce you to later.
If your cakes turned out with jagged edges and they differ significantly from each other, then this can be corrected by collecting a slide of cakes and cutting their edges under one. Flatten the cakes when they are cool before brushing them with cream. To do this, it is better to use a very sharp knife.
cream recipe
I suggest you "make friends" with a universal cream called "Plombir". This version of the cream can be used not only for our Milk Girl cake, but also for Napoleon or Honey Cake.
To prepare you need to take:
- milk of any fat content-400 ml;
- cream over 30% fat-200 ml;
- butter- 200 g;
- starch- 3 tablespoons with a slide;
- 1 egg;
- granulated sugar-180 g.
Start by whisking the egg, cornstarch and sugar until smooth. We warm the milk, let it boil and slowly pour it hot into the mixture, constantly stirring it with a whisk. Now cook the mixture like a regular custard over low heat.
Using too hot milk can cause lumps in the cream. If a mistake was made, then you can get rid of the lumps by passing the cream through a sieve.
As a result, the consistency of the mixture should become slightly thick.
Now you need to add oil to the cream for the "Milk Girl".
This can be done in two ways:
- Beat the softened butter with a mixer at high speed for several minutes until a fluffy mass is formed, into which then add and stir in the cooled cream with a spoon.
- In the hot cream, removed from the heat, immediately put the butter and stir until it melts and combines with the mass.
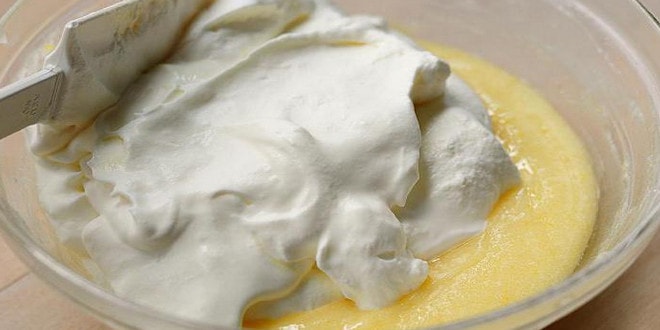
For further work, we will need an already cooled mixture. Now separately whip the cream, which must first be well cooled in the refrigerator or freezer.
When your cream has turned from a liquid state into a soft pillow, we introduce our custard and mix everything thoroughly with a mixer.
The filling for our "Milk Girl" is ready!
How beautiful to decorate and serve the "Milk Girl" cake
This cake is convenient because it can be served and decorated endlessly. It combines fruits, berries, nuts, chocolate sauce, and coke shavings. Therefore, problems with how to decorate the Milk Girl cake should not arise.
Lovers of even shapes can use cream cheese by making a beautiful rim of salted caramel, crushed with nuts and chocolate, or by laying cut bright and juicy fresh fruits on top. For those who love simplicity, you can cover the barrel with the remaining Plombir and build a hat, again from fruits. And those who are crazy about creams can decorate with protein cream, forming flowers, leaves and other decorative elements.
In this, the “Milk Girl” undoubtedly surpasses the “Napoleon”, with the decoration of which you can’t really fantasize. Experiment and share your experience!
In order for the cakes to turn out beautiful and lush, you need to follow all the instructions and not confuse the sequence of introducing all the ingredients.
Ready, while still warm cakes, it is better not to put them in slides, otherwise they may stick together. Let them cool completely before greasing the filling.
Send the cream for half an hour to the freezer along with a whisk and a bowl for whipping. To make the mass thick, the cream must be cold.
If your cakes are not very even, put them on top of each other without cream and trim the edges with a very sharp knife. In order to decorate the appearance of the cake, to make it smooth, you need a cream of a thicker consistency than ice cream. The best option would be cream cheese.
If it seems to you that the Plombir cream and Milk Girl cake layers are too sweet a mixture, then try making it with sour cream. It will add sourness and soften the sweetness of the cakes.
A very famous culinary specialist from America, Buddy Valastro, prepares cakes that are admired by the whole world, who are alive and who are on TV screens. Its advantage is simplicity, both in ingredients and in the combination of taste. He proved to everyone that simplicity is charm.
Each layer between the cakes can be filled with any nuts, including those in caramel, as well as berries, both fresh and frozen.
Video recipe for the "Milk Girl" cake
You can see in more detail the preparation of the Milk Girl cake in the video, which helped me figure out all the subtleties.
The recipe and the process itself is quite simple. Even if you have little experience in the confectionery business, then this version of the cake will not seem difficult. Just baking 14 pieces of cakes will take a decent amount of time. But you can always do the preparation of the cream in parallel.
Invitation to discussion and possible improvements
If you have interesting ideas combinations with another cream or decorating the Milk Girl cake, I will be glad to see and apply in my practice. I'm waiting for answers.

